Introduction
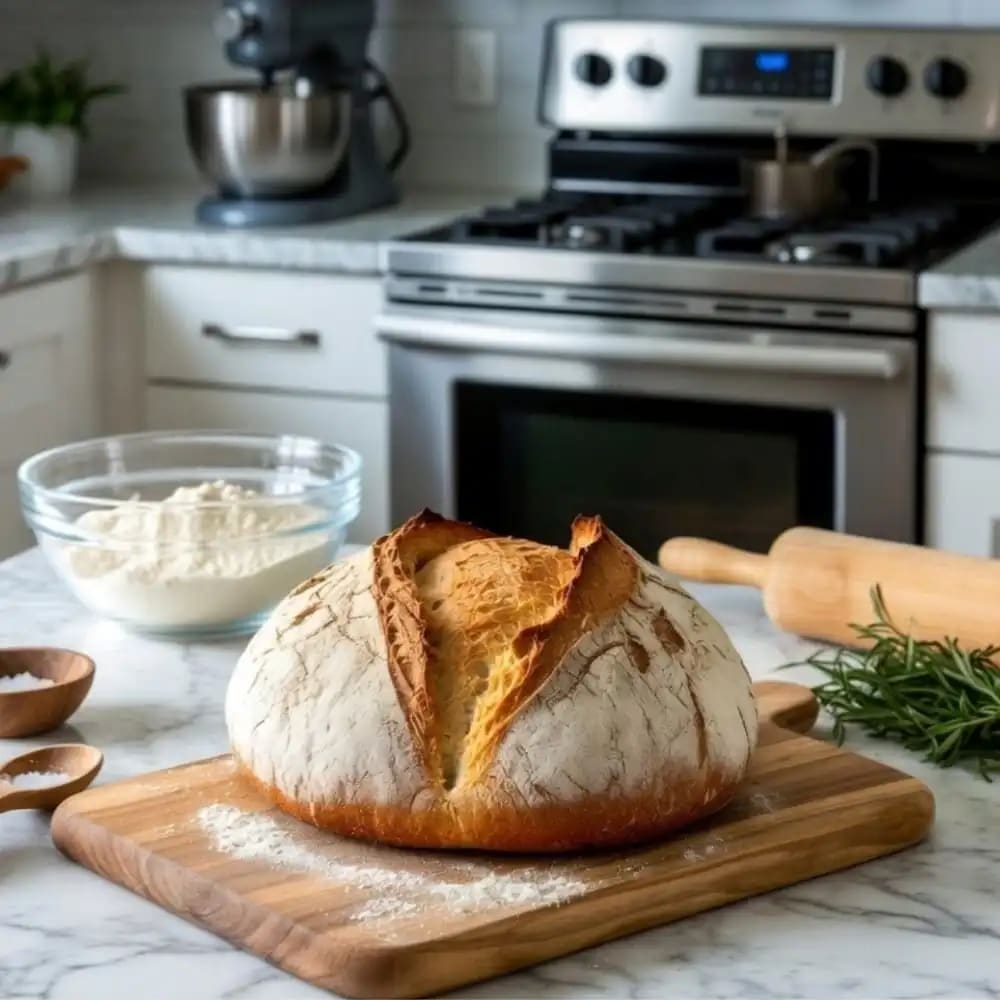
If you love rustic cooking as I do, then this Outdoor Boys Bread Recipe is going to be your new favorite adventure meal. The Outdoor Boys Bread Recipe is simple, comforting, and perfect for anyone who enjoys cooking outdoors.
» As a chef who grew up baking bread with my dad near old campfires, this comfort snack recipe always brings back beautiful memories—warm nights, glowing coals, and that magical smell of fresh bread rising into the cool air.
There’s something truly special about making bread outside. It feels raw, honest, and calming. And just like the Outdoor Boys style, this recipe lets you enjoy the outdoors while creating a loaf that’s golden, warm, and incredibly satisfying.
Let’s jump right into it!
👉 What Is Outdoor Boys Bread?
Outdoor Boys Bread is a simple campfire bread made popular by the Outdoor Boys YouTube channel. It’s known for being incredibly easy, rustic, and perfect for outdoor cooking.
Unlike traditional bread that requires a controlled oven, this version is meant to be baked over glowing coals, inside a Dutch oven, or even on a cast-iron pan.
Here’s why it’s so loved:
» It uses basic pantry ingredients you already have.
» The smoky flavor gives it a unique outdoor taste.
» It’s forgiving—even beginners get a beautiful loaf.
» You can cook it on a campfire, grill, or fire pit.
» The method creates a crispy crust with a soft, fluffy center.
It’s bread the way our ancestors might have baked it—simple, honest, and cooked under the open sky.
❤️ Why You’ll Love This Bread Recipe
» There are so many reasons to fall in love with this Outdoor Boys Bread Recipe! It brings a cozy, old-fashioned charm to outdoor cooking and tastes so much better than store-bought bread.
Here’s what makes it special:
» Fun to make with family—kids love it too!
» Soft inside + golden crust every single time
» Beginner-friendly steps—no fancy skills needed
» Smoky, rustic flavor you can only get from a fire
» Customizable with herbs, spices, cheese, and more
» Simple ingredients you already have in your kitchen
» Perfect for camping, road trips, and backyard cooking
Whether you’re cooking at a campsite or just enjoying a weekend outdoors, this bread adds warmth and comfort to every meal, and by the way, you can also try my favourite bread recipe!
👉 Kitchen Equipment Required For Outdoor Boys Bread Recipe
» You don’t need a lot to make this recipe, which is why it’s perfect for outdoor cooking. Here’s what you’ll need:
» Mixing bowl
» Knife or bread cutter
» Heat-resistant gloves
» Campfire or charcoal grill
» Cast-iron skillet (optional)
» Wooden spoon or spatula
» Measuring cups and spoons
» Dutch oven (ideal for even baking)
» Long tongs for handling hot coals
» Oven-safe parchment paper (optional)
This setup keeps things simple and easy, whether you’re in a backyard or deep in the woods.
Ingredients For Outdoor Boys Bread Recipe [2026]
» Here are the exact ingredient measurements you’ll need to make the perfect Outdoor Boys Bread Recipe:
👉 Basic Dough Ingredients
♥ 3 cups all-purpose flour
♥ 1 cup warm water (about 110°F / 43°C)
♥ 2 teaspoons active dry yeast
♥ 1 teaspoon salt
♥ 1 tablespoon sugar (optional, helps activate yeast)
♥ 1 tablespoon olive oil or melted butter (optional for softer bread)
👉 Optional Add-ins for Flavor
♥ 1 teaspoon garlic powder
♥ 1 teaspoon dried Italian herbs
♥ ½ cup shredded cheese (cheddar, mozzarella, or parmesan)
♥ 1 tablespoon honey (for a slightly sweet loaf)
These quantities make one medium-sized rustic loaf, perfect for a family camping meal or fireside snack.
Step-by-Step Instructions for Outdoor Boys Bread 2026
» Making Outdoor Boys Bread Recipe is simple, but taking your time with each step helps you get that fluffy inside and perfect golden crust. Below is a detailed guide that shows exactly what to do, plus tips I’ve learned from baking outdoors over the years.
🍽️ Serving: (4–6 servings)
⏱️ Prep Time: 15 minutes
🍳 Cook Time: 25 – 30 minutes
🛌 Resting Time: 1 hour (for dough rising)
⏲️ Total Time: 1 hour 45 minutes
💲Estimated Cost: Low – Budget-friendly
👉 Step 1. Mix the Dry Ingredients First
» Start by grabbing a large mixing bowl. Add in your flour, salt, yeast, and sugar.
♥ 3 cups all-purpose flour
♥ 1 teaspoon salt
♥ 2 teaspoons active dry yeast
♥ 1 tablespoon sugar (optional)
» Give everything a quick stir with your hand or a wooden spoon.
💡 Chef’s tip:
Mixing dry ingredients first spreads the yeast and salt evenly so your dough rises properly.
👉 Step 2. Add Warm Water Slowly
♥ Pour warm water (not hot!) into the bowl one little splash at a time.
♥ 1 cup warm water (about 110°F / 43°C)
♥ Stir as you pour, so the dough starts to form.
💡 Outdoor caution:
If your water is too hot, it will kill the yeast. You want it just warm like bathwater.
👉 Step 3. Start Kneading Until Smooth
♥ Once the dough starts sticking together, it’s time to knead.
♥ Place it on a clean surface and press it with your palms, fold it, turn it, and repeat. Do this for 8–10 minutes.
You’ll know the dough is ready when:
♥ It feels soft and stretchy
♥ It springs back when poked
♥ It doesn’t crumble
💡 Chef’s hint:
Outdoors, the dough may dry faster. If it feels tough, sprinkle a little water on your hands and keep kneading.
👉 Step 4. Let the Dough Rise (First Rise)
» Now you need to cover the kneaded dough in the bowl with:
♥ A towel
♥ Plastic wrap
♥ Or even a clean T-shirt if you’re camping
» Set it in a warm spot and wait about 45–60 minutes until it doubles in size.
💡 If you’re outdoors:
Place the bowl near the warm fire—NOT too close—so the heat helps the dough rise.
👉 Step 5. Shape the Dough Into a Loaf
» Once the dough has risen, press it gently to release air. This is called “punching down.”
Now shape the dough:
♥ Into a round loaf
♥ Into a log shape
♥ Or into rolls
♥ For a Dutch oven, a round loaf works best.
💡 Chef’s choice:
A tighter dough ball creates a prettier crust.
👉 Step 6. Second Rise (20–30 Minutes)
♥ Place the shaped dough into your Dutch oven or cast-iron skillet.
♥ Let it rest again for 20–30 minutes, so it becomes light and fluffy before baking.
💡 Pro tip:
If your Dutch oven is cold, this second rise helps the bread get a better oven spring.
👉 Step 7. Prepare the Campfire or Coals
♥ While the dough rises, get your heat source ready.
♥ Burn wood until you have steady, glowing coals
♥ Avoid direct flames
♥ Spread the coals evenly
♥ You want gentle heat, not a roaring fire.
💡 Important:
Too much heat burns the bottom before the inside cooks.
👉 Step 8. Bake the Bread in the Dutch Oven
» Bake the Bread
♥ Place the Dutch oven:
♥ On top of a layer of hot coals
♥ With 8–12 coals on the lid for even heat
♥ Let it bake for 25–40 minutes, depending on your fire’s strength.
♥ Rotate the pot every 10 minutes so the bread bakes evenly.
» Check for Doneness
♥ Your bread is ready when:
♥ The top is golden brown
♥ It sounds hollow when you tap the bottom
♥ If it seems pale, add a few coals and cook for 5–10 more minutes.
💡 Chef’s insight:
Don’t lift the lid too often—heat escapes quickly outdoors.
👉 Step 9. Let It Cool. Slice, Serve, and Enjoy!
♥ This step is tough because the bread smells so good, but cooling is important!
♥ Let the loaf rest for 10–15 minutes before cutting.
» Why?
♥ The steam escapes
♥ The crumb sets
♥ The slices hold their shape
♥ Now slice, serve, and enjoy the warm, rustic taste of homemade outdoor bread!
♥ This simple process ensures the bread stays fluffy and soft inside, with a perfect rustic crust.
Ingredient Substitutes For Outdoor Boys Bread Recipe
| Ingredient | Substitute Option | Notes |
|---|---|---|
| All-purpose flour | Bread flour | Makes bread slightly chewier |
| Yeast | Instant yeast | Rises faster; no need to proof |
| Warm water | Milk | Adds richness and softness |
| Sugar | Honey | Adds mild sweetness and color |
| Salt | Garlic salt | Slight flavor boost |
| Oil or butter | Margarine | Works well for outdoor cooking |
| Herbs | Italian seasoning | Adds aroma and flavor |
| Cheese | Parmesan or cheddar | Perfect for cheesy bread variations |
👉 Healthy Ingredient Swaps
» If you want a lighter, healthier version, these swaps taste great without losing flavor:
» Swap oil/butter for olive oil
» Use whole wheat flour for extra fiber
» Replace sugar with honey or maple syrup
» Mix half oat flour for a softer, healthier loaf
» Use low-sodium salt to reduce sodium levels
» Add seeds (chia, sesame, flax) to boost nutrients
These switches make the bread wholesome but still delicious and satisfying.
👉 Recipe Variations of Outdoor Boys Bread
» Want to upgrade the flavor? Try these fun versions:
» Cheesy Herb Bread – add shredded cheese + garlic, + parsley.
» Sweet Campfire Bread – mix cinnamon + sugar + a drizzle of honey.
» No-Knead Bread – skip the kneading and let the dough rise 8–12 hours.
» Whole Wheat Bread – mix half whole-wheat flour for a hearty texture.
Each variation brings a new twist to your outdoor cooking experience.
Tips for the Perfect Outdoor Boys Bread Recipe
» These simple tips will help you get a beautiful loaf every single time:
» Use warm water, not hot—hot water kills yeast.
» Let the dough rise in a warm spot, even outdoors.
» Don’t rush the rising time—bread needs patience.
» Keep the heat low and steady when cooking over coals.
» Rotate the Dutch oven every few minutes for even baking.
» Cool the bread for at least 5 to 10 minutes before slicing and serving.
» Add parchment paper to prevent sticking if your Dutch oven is older.
Mastering these tips means perfect bread every time, even under the open sky.
👉 Garnish & Presentation Tips
Even simple campfire bread can look stunning! Here are easy ideas:
» Brush the top with melted butter or garlic butter for shine
» Sprinkle a little parsley or rosemary before serving
» Add a touch of coarse sea salt for texture
» Pair with small bowls of butter, honey, or dips
» Cut into thick, warm slices for a cozy presentation
» If adding cheese, let it melt slightly before serving
» Serve slices on a wooden board for a rustic camp-style look
These simple touches make your bread look inviting and taste even better.
👉 Storage, Reheating & Make-Ahead Tips
Making bread outdoors doesn’t mean you can’t plan:
» Store baked bread in an airtight bag to keep it soft.
» Reheat slices on a campfire grill or skillet.
» Make dough at home, freeze it, and thaw before using.
» Bring a small cooler to keep dough fresh on long trips.
These tips are perfect for multi-day camping adventures.
Campfire Cooking Methods For Outdoor Boys Bread Recipe
» Outdoor Boys Bread Recipe is popular because it’s flexible—you can cook it almost anywhere. Whether you’re camping, hiking, or baking at home, these methods give you perfect results every time.
👉 Dutch Oven Baking Method
This is the classic Outdoor Boys style.
» Preheat a cast-iron Dutch oven by placing hot coals on the lid and underneath.
» Place the dough inside on parchment or a lightly greased surface.
» Bake until the top turns golden and the loaf sounds hollow when tapped.
This method gives a soft inside and a crisp, rustic crust.
👉 Cast-Iron Skillet Method
» Great for campfires, stoves, or grilling.
» Heat a cast-iron skillet until warm (not screaming hot).
» Add a little oil or butter.
» Flatten the dough slightly and cook covered to help it rise.
» Flip for even browning.
Results in a pan-bread style loaf with a chewy texture.
👉 Stone or Rock Baking Method
» Perfect for outdoor survival-style cooking.
» Choose a flat, clean stone and place it near—not inside—the flames.
» Allow the stone to heat gradually.
» Lay the dough directly on the stone.
» Flip when the bottom browns.
Creates a smoky, earthy flavor and a very rustic look.
👉 Foil Wrap Campfire Method
» Great for campers and hikers with limited tools.
» Wrap the dough tightly in buttered foil.
» Place near hot coals (not directly on flames).
» Rotate every few minutes.
The bread comes out soft, moist, and slightly smoky.
Outdoor Boys Bread – With Yeast vs. Without Yeast
📊 Comparison Table
| Feature / Element | With Yeast Version | Without Yeast Version |
|---|---|---|
| Texture | Light, airy, softer interior | Dense, rustic, slightly chewy |
| Rise Time | Requires 45–60 minutes | No rise time needed |
| Prep Time | 10–15 minutes | 5–10 minutes |
| Cook Time | 25–30 minutes | 20–25 minutes |
| Ingredients | Flour, water, yeast, salt, sugar | Flour, water, salt, baking powder (optional) |
| Flavor Profile | Mild, classic bread taste | Earthy, camp-style flatbread notes |
| Best For | Sandwiches, slicing, everyday meals | Camping, quick snacks, frying or grilling |
| Cooking Method | Works great in Dutch oven or oven | Perfect for skillet, campfire stone, or pan |
| Difficulty Level | Easy | Very easy |
| Shelf Life | Stays soft longer (1–2 days) | Best eaten fresh (same day) |
| Extra Add-ins | Herbs, butter, garlic, cheese | Oil, herbs, spices, honey |
Some quick insight
» The yeast version gives you the classic fluffy loaf that the Outdoor Boys sometimes make in Dutch ovens.
» The no-yeast version is ideal for hikers and campers because it’s quicker, uses fewer ingredients, and cooks well over an open fire.
Common Mistakes to Avoid When Making This Bread
» Here’s what to watch out for:
» Overmixing – makes the bread tough.
» Too much flour – to avoid dryness of the dough.
» Hot water kills the yeast.
» Direct flames – burn the bottom.
» Rushing the rise time affects texture.
» Slow and steady wins the bread game—even outdoors!
What to Serve with Outdoor Boys Bread (Tasty Pairings!)
» This bread pairs well with almost anything:
» Campfire stews and hearty soups
» Grilled chicken, sausages, or vegetables
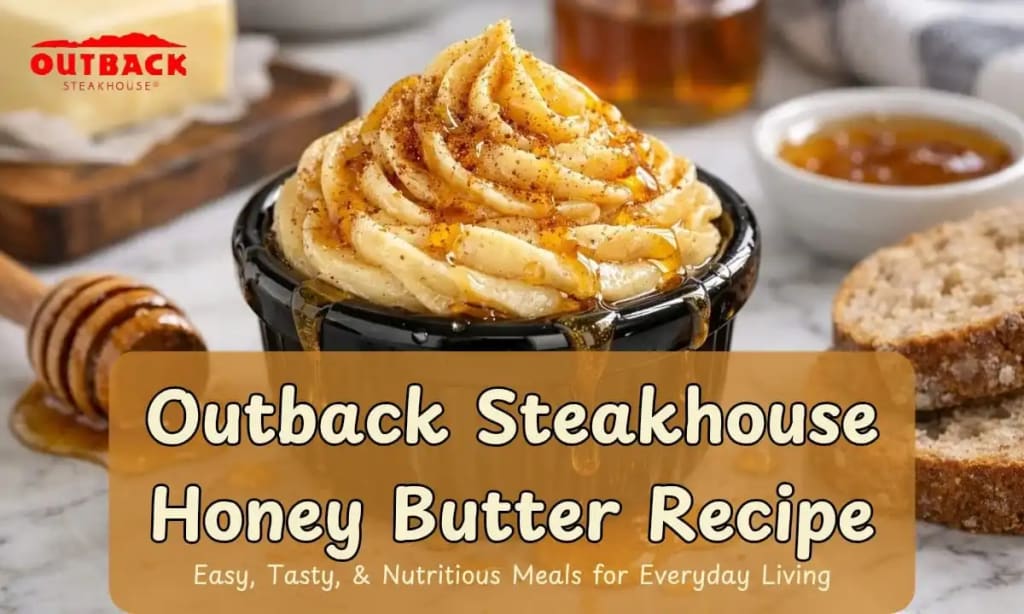
» Garlic butter, herb butter, or honey butter
» Breakfast items like eggs, jam, bacon, or cheese
It’s the kind of bread that fits every meal outdoors.
Best Alternate Bread Recipes You Can Try!
» If you enjoyed this outdoor-style bread, you’ll love these recipes too:
♥ Dutch Oven Artisan Bread
♥ No-Knead Overnight Bread
♥ Garlic Herb Skillet Bread
♥ Campfire Bannock Bread
♥ Rustic Whole Wheat Loaf
♥ Honey Butter Cornbread
♥ Simple Cast-Iron Flatbread
♥ Campfire Cinnamon Twist Bread
♥ No-Oven Stovetop Bread Recipe
♥ Aldi’s Mama Cozzi Pizza Dough Recipe
♥ Fluffy Cottage Cheese Cloud Bread Recipe
Each of these breads is easy, flavorful, and perfect for outdoor cooking.
Outdoor Boys Bread Recipe Nutrition Facts
» Approximate values per 1 slice (based on a standard loaf)
| Nutrient | Amount |
|---|---|
| Calories | 145 kcal |
| Carbohydrates | 28 g |
| Protein | 4 g |
| Fat | 2 g |
| Fiber | 1 g |
| Sugar | 1 g |
| Sodium | 210 mg |
| Cholesterol | 0 mg |
| Saturated Fat | 0.5 g |
| Calcium | 6 mg |
| Iron | 1.5 mg |
These values may vary depending on your specific ingredients and add-ins.

Outdoor Boys Bread Recipe
Ingredients
Equipment
Method
- First you need to gently mix the flour, sugar, salt, & yeast in a bowl.
- Add warm water and stir until dough forms.
- Cover and let rise for 1 hour.
- Shape the dough and place inside a cast-iron pot.
- Cook over campfire coals or bake in the oven until golden.
- Cool slightly before slicing and serving warm.
Notes
- For a more rustic flavor, replace some flour with whole wheat.
- Use warm—not hot—water for the yeast to activate correctly.
- Campfire versions may cook faster or slower depending on the heat.
- Add herbs, garlic, or butter for extra flavor.
- Bread tastes best fresh, but can be stored for 2 days in an airtight container.
Frequently Asked Questions
What’s the best flour to use outdoors?
All-purpose flour works perfectly because it’s easy to handle and forgiving. Bread flour is another good option if you prefer a chewier texture, but it’s not required for great results.
How do I store leftover Outdoor Boys Bread?
Let the bread cool completely, then store it in an airtight bag or container. It stays fresh for 2–3 days and reheats beautifully over a campfire grill or skillet.
How can I prevent the bottom from burning?
Placing a small rock or metal trivet under the Dutch oven also helps reduce direct heat and keeps the bottom from darkening too fast.
How long does the dough take to rise outdoors?
Usually 45–60 minutes, but it may take longer in cold weather. To help the dough rise faster, place the bowl near warm coals—just not too close to avoid overheating the yeast.
Can I make Outdoor Boys Bread without a Dutch oven?
Yes! You can bake it in a cast-iron skillet with foil on top or place the dough inside a heat-safe pot. Just make sure the heat is low and steady for even cooking.
My Final Thoughts
Cooking this Outdoor Boys Bread Recipe always makes me feel like I’m stepping into a peaceful moment away from the noise of everyday life.
» As a chef, I love how this simple loaf brings people together—whether it’s around a campfire, a backyard fire pit, or even just a small grill on the patio.
» There’s a certain magic in watching dough rise under the open sky and smelling that warm, smoky aroma as your bread bakes. It reminds me why I fell in love with baking in the first place—the joy, the calm, and the connection it brings.
So go ahead, pack your ingredients, head outdoors, and bake a loaf that tastes like adventure. Trust me… once you make it, you’ll want to bake it every time you’re out in nature.
Now, if you have any thoughts, then write to me in the comment section below! – I’d love to hear from you. Or you can also try my other homemade recipes. Till then..
Happy baking, my friend!
⭐ Recipes You May Also Like!
♥ Rougamo Bread Recipe
♥ No-Oven Stovetop Bread Recipe
♥ Aldi’s Mama Cozzi Pizza Dough Recipe
♥ Fluffy Cottage Cheese Cloud Bread Recipe